Showing posts with label recipe. Show all posts

Saturday, December 31, 2011

Just Because and a Great Cookie Recipe.


I didn't want my post about Tin Tin to be the last thing I post for the year.  But I can't say I have any goals or resolutions set for the start of the new year. I am still in the thick of the holiday whirlwind. It doesn't really end around her until after Ian's Birthday which is still a week away. And this year he turns 8 so there is all sorts of things to do and plan for.

So anyway... this post is mostly some random pictures from the last few weeks.  They don't fit into a post and yet to don't want to loose them or forget about them.


My kids all loved the candles. They asked if we could light them just about every night.
Here Molly is holding a chocolate frog which is the treat I made for each of our co op friends.  Oh and those cookies on the counter are the BEST! I got it from this site. But just so I don't forget it I am going to repost it here.  These are SOOO good!


Better-than-Brownies Chocolate Cookies

2 2/3 cups (about 16 ounces) bittersweet chocolate, chopped
4 tablespoons unsalted butter, at room temperature
4 eggs
1 1/3 cups granulated sugar
1 teaspoon vanilla extract
1/2 cup all-purpose flour
1/2 teaspoon baking powder
1 cup semisweet chocolate chips

Preheat oven to 350 F. Line two large baking sheets with parchment paper.

Put the chocolate and butter in a heatproof bowl and set it over a saucepan of barely simmering water, stirring occasionally, until completely melted and smooth.

In the meantime, whisk together the eggs, vanilla and sugar in a medium bowl. Set aside. In a small bowl, sift together the flour and baking powder.

Add the melted chocolate mixture to the egg mixture and stir to combine well. Slowly add the dry ingredients, folding them into the batter. Once all of the flour is incorporated, fold in the chocolate chips.

Scoop about 1 1/2 tablespoons of dough (a medium cookie scoop’s worth) onto prepared baking sheets. Bake for 10-12 minutes or until the cookies are firm on the outside. Like brownies, do not overbake! Leave to cool completely on the baking sheets.

Makes about 24 cookies

One Grandma gave Henry this monkey but Molly quickly took charge of it and has been holding it like a baby wrapped in a blanket. She calls it her Baby Jesus.
We checked out The Strange Case of Origami Yoda and of course had to make a few origami Yoda puppets.

And now I will get back to playing with all the new toys and games we received for Christmas. The boys have especially loved their Mario, Luigi and Yoshi Knex toys. They have been building little tracks for them to race through for days now.
We have had a good year and look forward to the next.


Have a Happy New Year!

Sunday, January 30, 2011

Sweet Potato Kale Soup


I have recently been trying to add new vegetables to our usual assortment of dinners. We certainly aren't Vegan but we have many meatless meals in our house. I have been making sure we eat a wide assortment of colorful veg. Well I have been buying kale for awhile but have only added it to our green smoothies. Sweet potatoes are a recent addition to our regular diet.  So when I saw this recipe for Sweet Potato Kale soup I decided I had to give it a try. I don't know how I ended up on this blog. It isn't one I usually read so it must have been a link from a different blog. But this is where I got the recipe. I am trying to be better about remembering where I get my recipes so when I share them I can give credit where it is due.


Kale and Sweet Potato Soup

2 tablespoons olive oil
1 medium onion, diced
2 cloves garlic, chopped fine
2 teaspoons fresh ginger, chopped fine
3/4 teaspoon turmeric
1/4 teaspoon crushed red peppers
3/4 pound kale, tough stems removed  and roughly chopped
1 1/2 pounds sweet potatoes (yams), peeled and diced into 3/4-inch cubes
1 1/2 quart chicken or vegetable broth
1 teaspoon salt
fresh ground pepper, to taste
1 cup canned unsweetened coconut milk
2 cups cooked brown rice

In a large saucepan, heat the olive oil over medium heat.  Add the onions and cook down until tender and translucent, about five minutes.  Add the garlic, ginger, turmeric and crushed red pepper flakes.  
Cook, stirring, for about 1 minutes.
Add the sweet potato chunks and stir.
Add the chicken or vegetable broth and bring to a simmer.
Add the kale once the broth is simmering and submerge all of the leaves, helping them to cook down.
Cook for about 20 minutes, or until the sweet potatoes have become tender.
Add salt and pepper to taste.
Lastly, stir in coconut milk, heat through and serve over a bed of brown rice.

 I don't usually have coconut milk in my pantry so I had to remember to get some the next grocery trip. And I admit I didn't have the crushed red pepper flakes so I just chopped up a red pepper and sauteed it with the onion. I also used dried garlic and ginger. I don't use ginger all that often and my garlic was all gone. So I made due with what I had and it still tasted wonderful. Tumeric is such a flavorful spice!

Now my kids did not eat this willingly. They always take a few bites and drink the broth but it will take me serving it a few times before they embrace it. Even then it may not be something they look forward to.  They did love the corn bread I made.  I know... corn bread isn't the greatest side dish to serve this with. But it sounded good on this rainy Sunday and I knew if my kids didn't eat their soup they would eat that. It was also a good ensentive to get them to try the bit of soup they did eat.

My husband and I loved it!

I love finding new ways to add healthy foods into our diets. And soup is becoming one of my best experiments!

Tuesday, January 25, 2011

ChickPea Brownies

The other day a friend posted, on Facebook, a recipe for brownies that didn't use any flour and used Chickpeas instead. It is a very simple recipe and I have all the items on the ingredients list. I also needed an incentive to get my kids to eat their soup for dinner. So I whipped up a batch of these to see how they would turn out.

Sophie said "they don't taste any different". I guess that is praise indeed coming from my most picky eater. My husband said he liked them but could taste the honey I used instead of sugar.

Here is the recipe (as it was posted) for those that would like to try these yummy treats.

Ingredients:
1 16 oz can of chickpeas (garbanzo beans)
4 eggs
...3/4 cup palm sugar (I used honey)
1 tsp baking powder
1.5 cups semi-sweet chocolate chips
2 tbsp butter

Directions:
Preheat oven to 350 degrees. Bake in a non-stick springform pan. Alternatively, butter and dust with cocoa the sides and bottom of an 8 or 9 inch round cake pan.

Drain and rinse chickpeas. Place in the bowl of food processor, fitted with steel blade. Add eggs and process until smooth. Add the sugar and baking powder. Pulse to blend.

Melt butter and chocolate in a dry bowl--either in the microwave, in a double boiler or very carefully over low heat. Make sure that no water gets in the bowl or the chocolate could seize, or that you don't overheat the chocolate, lest it scorches.

Add the chocolate to the chickpea mixture and process until it's fully incorporated. Pour the batter into the pan and bake for approx. 40 minutes. The cake should be set--firm around the edges, slightly soft in the middle. If you stick a clean knife or skewer in the middle it will not come out clean, but moist and crumb-y.

The brownies didn't come out the pan very cleanly. Perhaps because I just used my usual glass 9x9 pan. But nobody minded the crumbly pile of chocolate goodness that was given to them. I severed them in a small bowl so we could add a little milk. I bet they would great with ice cream but you do almost need something to cut the sweetness a little.

I have a feeling these will be a good way to put more beans in our diet. Not that chickpeas aren't already a part of our usual meals. My kids love them on their salads and we eat a lot of hummus also. I wonder if I can just use any kind of bean and they would turn out?

I guess I will have to experiment. But what better thing to be experimenting on, than chocolate brownies!?

Thanks Marci for the great recipe!

Saturday, September 11, 2010

Healthy Cinnamon Rolls??

I was up at the crack of dawn. Actually it was before dawn even cracked because all the world was dark still.  I had a job to do and it couldn't wait. I had a birthday girl who was expecting something special for breakfast. I decided to make her the Cinnamon Rolls I had been planning to try for ages. I LOVE my Laurel's Kitchen Bread book and have now tried quite a few of the recipes. I am getting really good at making bread. It also helps to have the Kitchenaid mixer that does the kneading for me.  But cinnamon rolls require raising time and that ment I had to get up early.


I don't feel totally right about posting the recipe for these tasty treets but here is the page from the book.
In case you can't read it, these rolls are made from dough that uses cottage cheese and milk as the liquids. Pair that with the whole wheat flour and you can almost say these are healthy. It was a good thing I didn't need any all purpose white flour because Molly dumped my bucket all over the floor (see previous post) and I didn't have another bag in the pantry. I don't use white flour very much any more so haven't bought it in a long time. I guess it is time to get some. I do have a birthday cake to make later today.


The Recipe make two loves of bread so I just made one of them into the rolls and the other into Cinnamon Raisen bread. But the not so healthy part of these rolls is the frosting. You can't have cinnamon rolls without the melting, dripping frosting. (Now you know why I have those extra 25 lbs.)
Mix a little butter and powdered sugar together and it adds the finishing, and fatning part of these tasty treet.

I know my girl was happy with her tasty birthday breakfast!

I hope it has some staying power because we have a busy day ahead of us.

Thursday, June 24, 2010

Buckwheat cakes

I have started experimenting with different grains. I have been using a lot of oatmeal and wheat in my baking but have starting baking using rice and even bean flours too. One I have wanted to try for awhile is buckwheat. We have been listening to a lot of old traveling west music and in the song O'Susanna it says that she has a buckwheat cake in mouth. So I know they have been using buckwheat for a long time, especially for pancakes.

I found some buckwheat groats at the Whole Foods Market and decided to give them a try. I ground them up in my grinder to make a nice flour and found a recipe online.

This is the one I followed.

Buckwheat Blueberry Pancakes

3/4 cup buckwheat flour
3/4 cup whole wheat flour
1 1/2 tsp baking powder
1/2 tsp baking soda
1/4 tsp salt
1 cup buttermilk
3/4 cup milk (I used clabbered milk, 1 3/4 cups of milk with 2 T lemon juice in it and let is sit for a bit, instead of the buttermilk and milk.)
1 T Honey
2 large eggs
2 T canola oil

You can add a cup of blueberries if you like or just put them on top which is what we did instead of syrup. We have also started using Blue Agave sweetner instead of always using expensive real Maple syrup on our pancakes.

I really enjoyed these pancakes and have made them a few more times since I ground up enough of the buckwheat flour. They have a different texture and a sort of nutty flavor.

I made my regular old Oatmeal pancakes for breakfast today and I have to admit they tasted a little bland to me after having buckwheat pancakes the last few weeks. They have a little more flavor so you don't have to have as much syrup or topings.

I am going to keep experimenting with recipes because I have seen some that use rice flour instead of the wheat. Not that I have anything against wheat and we aren't on a gluten free diet. I just want to add a little more variety to what grains we are eating.

Wednesday, April 21, 2010

I finally gave it a try.

A friend recently recommended  The Laurel's Kitchen Bread Book as a great whole grain bread baking book. I put the book on hold at the library and then when it finally came in I brought it home and it sat on the shelf for 3 weeks. It is due on Thursday and I thought I had better give it a least a look and maybe one recipe a try. I have been meaning to try to make my own pita bread so I found a recipe for pocket bread in this cookbook.
It was a nice rainy day so it was perfect for baking. First I had to grind my wheat into flour. I love having an electric wheat grinder. 6 cups of flour is ground so quickly. It used to take me a really long time to hand grind it. Plus the flour is ground so much finer.

The recipe for pita bread was so simple, flour, water, yeast and salt. I added a little bit of honey to the yeast water because I just felt like I needed to, but the recipe said it wasn't necessary. And then just let it raise and then raise again. Evidently the secret to pita is the quick baking of them.  I loved that the book explained the whole process and what was going on with the bread that made it puff up.

It was a little time consuming to roll out each of the pitas but the baking goes so quickly that before I knew it I had rolled and baked 20 rounds. When they had cooled and I cut them in half I was so impressed with my first attempt at this bread.  There were a few of them that didn't puff up. I must have been a little too rough on the dough when rolling them out. These made great pita chips. They tasted great with the hummus I made a few days ago. Hummus is another food I have been meaning to make but just never seemed to get around to. I just don't have sesame seeds on hand very often.

I am going to have to try to renew the book at the library. I need to give a few more recipes a try. I saw english muffins in there and a few others I wouldn't mind giving a try.  Thanks Jen for recommending this cookbook!

I need to make more pita. My kids seem to really love it. It may just be the novelty of it but it went really fast!
 

Sorry... none of these pictures are mine. My pita didn't look quite so nice as the ones in the picture, but my husband said many of his co-workers said they were great when he shared a few of them at lunch today.
I still haven't found my camera and am starting to think I need to just buy another one. I don't have the best record with cameras. I tend to loose them or drop them and damage them quite often. Does anyone have a good cheep camera they could recommend?

Friday, March 19, 2010

A Few Good Things

The last few weeks have been especially difficult academically. We do school but rather haphazardly. My kids do some work and then quickly run off to do something else as soon as they can get away. I read aloud to them and after one chapter they ask if it can be done because they would rather play Legos or outside.

We have had a number of tantrums throughout the day when I ask them to do anything. I am feeling more and more like a schoolmarm and less like my kids are learning because they want to learn. So I have pulled back my expectations a bit and we read a bit and play a lot. We have even taken a little time to just go for walks and play at the park.

There are a few things that seemed to have gone well this week and hopefully will become habits.

One of the things we have been reading this week is The Children's book of Virtues.  After our scripture reading each morning I had been reading an article or two out of the Friend magazine. When we finished it I needed something else to fill in that space that would lead to some character training and discussion so I pulled the Children's book of Virtues off the shelf. The kids seem to have enjoyed the stories we have read from the book thus far. They really loved the story about the little please that lived in the boys mouth. Henry often asks me to see if I can find the please in his mouth now. The book isn't that long so I think I may jump to the actual Book of Virtues when we have finished. Of course when the April issue of the Friend comes we will read that again as well.


 Sophie is often asking me to let her make some thing. When I ask her what she has in mind it is always dessert type things. In my quest to eat more healthfully we haven't been baking cookies or cakes or any deserts really but Sophie still wants to cook something.  So we tried a new recipe for a treat that is a little more healthy but still fun to make and eat. We made Granola bars. I got the recipe off of a blog I had read (I wish I could remember where I got it and give her credit. I often just copy and print recipes without labeling them with where I got them).

Here is the Recipe as I copied it. 


Chewy Granola Bars
For Granola:
2 cups oats
3/4 cup puffed rice cereal
3/4 cup sunflower seeds, salted and roasted
1 cup crushed peanuts, salted and roasted
1/2 cup raisins
2/3 cup brown sugar
1/4 cup honey
4 Tbsp. butter
2 tsp vanilla extract

For Chocolate Sauce:
1/4 semi-sweet chocolate chips
1 tsp. shortening

Spread oats on a baking sheet and toast in a 400 degree oven for about 10 minutes.  Be sure to stir them every few minutes to avoid burning.  Once oats are done toasting, set aside and turn off the oven.  Line a 9 x 13 inch glass baking dish with wax paper and lightly spray with non-stick cooking spray.  
In a small sauce pan over medium heat, mix the brown sugar, honey, butter and vanilla.  Stir frequently, until butter is melted and brown sugar is dissolved. Mix all dry ingredients in a large bowl.  Add the melted butter and sugar mixture and mix all ingredients very well.  
Spread the granola out into the bottom of the prepared baking dish.  Add a sheet of wax paper to the top and press down firmly to make sure your bars are well compacted.  Let cool completely (about 2 hours).
Add chocolate chips and shortening to a double boiler and stir constantly until melted. Drissle chocolate over granola.  Allow to firm up (about 20 minutes).
Carefully transfer granola onto a large cutting board and cut using a very sharp knife and pressing down firmly to make a clean cut. Store in an air-tight container.


I don't make them exactly as they are described here. I don't usually use rice cereal since I couldn't find any that didn't have HFCS in it. So instead I broke up Multigrain Cheerios instead and they seemed to work just fine. I am sure any kind of cereal would work. I also didn't like the taste of the sunflower seeds (I don't think the ones I used in the first batch were salted and roasted. That could make all the difference!) So I just put some mixed nuts in the food processor and ground them up and put them in instead.  I have also put in dried apricots or craisins in place of the raisins. My husband took some of these bars to work and got many complements on their taste. My kids eat them and they seem healthier than cookies so I am thinking they will become a staple around these parts.

With the lovely Spring like weather I am not surprised that doing school is getting harder. But there have been a few things accomplished and that IS A GOOD THING!

Thursday, February 19, 2009

Not every cookie needs Chocolate Chips

Today Sophie decided we needed to bake something. We have been studying fractions in Math this week and of course fractions mean cooking. So I said... we can make this really good Oatmeal Cookie Recipe we could try. "Do they have Chocolate Chips in them?" she asked. I told her these don't need Chocolate Chips. She didn't fully believe me and tried to convince me to throw in a few handfuls as we added the ingredients and mixed them together. My kids seem to think everything requires chips in it. (I made banana bread earlier this week and had to throw in some chips to make it a "dessert treat".)
After mixing all the ingredients together. Sophie sampled the dough a little skeptically but told me it tasted alright. The boys didn't seem to miss anything while they licked the beaters.

The cookies are made from a recipe that my Mom made all the time when I was growing up called "Pride of Iowa cookies". (Someone in Iowa must have made up this recipe??) I don't usually make them because they require coconut. But since I specifically bought some coconut last week to try these, I had some coconut in the fridge waiting for my next baking project.

In case you might be able to persuade your kids to eat cookies that don't have chocolate chips in them....

Pride of Iowa Cookies

2 cups flour
1 tsp. baking powder
1 tsp. baking soda
1/2 tsp. Salt
1 cup shortening
1 cup sugar
1 cup brown sugar
2 eggs
2 tsp. vanilla
3 cups quick-cooking oats
1 cup flaked coconut
1/2 cup chopped walnuts (I usually leave these off but if you have walnuts then throw them in)

Sift together flour, baking powder, soda and salt; set aside. Cream together shortening and sugars in a bowl until light and fluffy, using electric mixer at medium speed. Add eggs, one at a time, beating well after each addition. Beat in vanilla. Gradually stir dry ingredients into creamed mixture, mixing well. Stir in oats, coconut and walnuts. Form small 1 in balls and place on a greased baking sheet about 2" apart. Flatten each with floured tines of fork or bottom of a drinking glass. Bake in 350 degree oven for 8-10 minutes, or until golden brown. Remove from baking sheets and cool on racks.

My kids certainly enjoyed their cookies and milk this afternoon and didn't even mention the missing chocolate chips.

Friday, May 23, 2008

Sophie's Salmon Lapbook

The American Girl, Kaya's Nez Perce people ate so much Salmon and they talk about Salmon so much in the books I thought it we should do a more in depth study of Salmon. We of course have read many times the Magic School Bus goes Upstream but never really done a study or them. We also haven't made a lapbook in ages. We used to make a lapbook for each of the FIAR books we studied but I couldn't keep up with it and ended up not doing many more. But the other day I went to Homeschool Share and look through the free lapbooks they have there and Salmon was there and I thought that would be fun to do. We didn't do everything they had prepared for their lapbook but picked a few to go along with our study. And then added a bunch more pictures. We love pictures.
Here is Sophie's cover.After reading about salmon from the books we found at the library we went online to find out some information and pictures and found a page with most of the different types of Salmon listed with a picture of what they look like. So that is what she used for her cover. It is funny. In our reading they said there were 6 different Pacific Salmon and only one Atlantic Salmon. Somehow we ended up with Seven Pacific Salmon. They all look different too so I don't know which one doesn't belong or is a duplicate.
Sophie also got started gluing things into the folder before I could fold it so the flaps are in the center. She left the file folder as it was and went on with her gluing. Putting this lapbook together was another one of those moments when I really have to let her do it herself and not dictate too much exactly how I think it needs to be done. But she did need some direction otherwise she would have just pasted things in without taking the time to think about how they all worked together. It was a good lesson on organization and not rushing. She often just rushes to get the job done and then gets upset the the end result isn't up to her expectations. I had to help her pause and think a lot.

Here is the folder when you open it. This is all the information about the life cycle.Her pictures of the stages of development in the wheel are really good. But she also wanted to include the pictures we found online as well.

When the flap with the wheel on it is lifted there is some information about the number of Salmon that make it from egg to spawning adult. Salmon sure go through a lot just to end up with 2 surviving "children".
When the page is turned you see information, on the left, about where the salmon live and what they do in the fresh water and Salt Water. On the right there is a yellow added page that has pictures of what the salmon eat.

With the pink flap lifted you see the map which Sophie colored where the Salmon swimming grounds are. There is also a little picture of how far out the different salmon swim in the ocean before they return to find their stream.

With the yellow page lifted Sophie glued in pictures of some of the creatures that eat Salmon.
We actually have one last page to fill on the inside back cover. I suggested maybe we need to find a picture of the way we as a family eat salmon. My kids get all excited when I tell them we are having salmon for dinner. We often have canned salmon on salad. I make salmon patties once in awhile when I can't get salmon on a good price and only have canned. And when I do get frozen or fresh salmon I just bake it in lemon juice and pepper. And my personal favorite is salmon with tomatoes. Here is the recipe.

Pan Roasted Salmon and Tomatoes

1 ½ pounds Salmon steaks, about ¾ inch thick
2 Tablespoons all purpose flour
2 Tablespoons olive oil
½ teaspoon salt
pepper
2 14 ½ -ounce cans diced tomatoes
2 garlic cloves
2 Tablespoons chooped fresh basil

Dredge the fish in flour. Meanwhile heat the oil in a large skillet over medium heat until it shimmers. Add the fish and brown about 3 minutes on each side. Carefully lift the fish out of the skillet and set it aside on a platter; sprinkle with salt and pepper. Add the tomatoes and garlic to the skillet and bring to a boil over high heat. Cook 3 minutes. Reduce heat to low and return fish to the pan. Cover and cook 5 minutes or until the fish flakes when tested with a fork or the tip of a knife. Remove the fish to a platter and cover loosely with foil to keep warm. Increase heat to high add basil, and reduce the sauce, stirring frequently, until thickened, about 3 minutes.

Variation 1
Pan-Roasted Salmon and White Beans

Prepare the Pan-Roasted salmon and tomatoes recipe but omit the basil. Use only one can of diced tomatoes and add it with one 16 ounce can of small white navy beans (drained). When returning the fish to the skillet, add 2 tablespoons fresh tarragon. There’s no need to reduce the sauce.

Variation 2
Pan-Roasted Salmon and Sweet Onions

Prepare Pan-Roasted Salmon and Tomatoes recipe but omit the Tomatoes and basil. Slice 2 large yellow onions and saute them with the garlic until limp. When returning the fish to the skillet, add 2 tablespoons fresh thyme leaves, ½ cup black olives (pitted), and 2 tablespoons water. There’s no need to reduce the sauce.

Note:
All these recipes also work with Halibut, sea bass, or tuna steaks

I got these recipes from a Magazine and have made each one. They are very good! I don’t use fresh spices I use the dried spices and they turn out tasting great. It is a fast (30 min total) and easy. I often serve with noodles or couscous. I think we need to have this soon! Yum. Except like most things salmon is going to be very expensive since people/companies aren't allowed to fish salmon this year due to low salmon populations.

Saturday, February 9, 2008

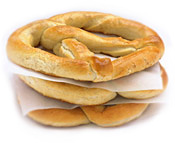
Soft Pretzel/ Bread Sticks


I don't mean for this to be a recipe blog. But my bread recipe was requested. Since I am sitting here with my cookbook I thought I would include one more. This one is for Soft Pretzels. Lately I have been using this recipe to make bread sticks to go with our spaghetti dinners. They taste so good dipped in sauce.

1 1/4 cups of water
1 T light brown sugar
1 packet of active dry yeast (2 1/4 tsp)
3 1/4 cups flour
1 1/2 tsp salt

Heat the water until it is warm not hot. Mix the brown sugar in the water then sprinkle the yeast over this mixture. Let it sit while you get the flour and salt ready. Pour wet mixture over the dry and mix well. Knead the dough until it is smooth. Then cover and let it raise in a warm place for about 45 min to 1 hour. If you are making pretzels divide dough into 6 parts and roll each part into long thin snakes about 3 feet long. (my kids love this part). Shape the ropes of dough by making a circle and twisting the ends. Fold ends back over the circle and pinch the dough. Place the finished shapes on lightly greased baking sheet. Paint on each pretzel a little water/sugar mixture.

1/2 cup Hot water
1 tsp sugar

Top them with a bit of course salt. Set aside for 10 min. Bake pretzels for 12-15 min.

Melt 3 Tablespoons of butter.
Place a sheet of aluminum foil under a wire rack and transfer baked pretzels to the rack. Using pasty brush, apply melted butter liberally over the pretzels; this makes them soft and flavorful. Enjoy them while they are warm.

If I make them into bread sticks I just don't shape them. I roll them out and cut the ropes into 4 in long sticks and proceed like normal. After painting on butter I sprinkle on some garlic Salt. The smell of the butter and garlic is wonderful! My kids ate 4 sticks each last night at dinner. They could have eaten more except they were gone.

You can also make these into a dessert by sprinkling on some cinnamon and sugar before baking and again after you butter them when they come out of the oven.

Not the most healthy treat but very tasty!

Honey Whole Wheat Bread

This is a recipe for homemade bread that my Mom used to make when I was little. I didn't appreciate it then. I hated it when I had a sandwich in the lunch box made from homemade bread. It crumbled too much. Now I love homemade bread. My kids don't love it for sandwiches either but they love it hot out of the oven or toasted with butter and honey.

1 cup milk
1 cup water
1/2 cup honey
3 T margarine
3 1/2 cup bread flour
2 1/2 cup whole wheat flour
2 pkg. active dry yeast
1 egg
1 T salt

Heat milk, water, honey and butter until warm about 120 degrees F. add yeast and let sit. Combine all the other ingredients in bowl. Then add the milk mixture. Mix thoroughly. Knead until smooth. Cover and let rise in a warm place until doubled, about 1 hour. Punch down and divide into two equal parts. Shape loaves and place in 2 greased 9x5x3 pans. Cover and let rise in warm place until doubled, about 45 min. Bake in a 375 F. oven for 10 min. Reduce heat to 350 F. and continue to bake another 30 minutes.

Saturday, February 2, 2008

How does it taste?

I have had a number of skeptics ask how the yogurt tastes. So let me just explain that this is kid tested. Not just any kids, but my kids. My very picky, wont eat most things, kids. They love it!
It does stink like spoiled milk when you are moving the warm yogurt to the fridge but after cooling down in the fridge over night it smells just fine. It is a little runnier than store bought yogurt but if you want it thicker then just leave it in the crock pot longer. I have been told it makes it thicker but also makes it sharper tasting.

As for taste.....It is plain yogurt without any sweetness so we mix in a spoon full of jam and it tastes great. I usually just dump a bunch of jam in the whole batch and we have apricot yogurt for a bit until the next batch when I make it strawberry or what ever jam we have on hand. You can make it as sweet as you like by adding in as much jam or other sweetener or leave it as sour as you would like. Plain, it can even be used as a substitute for sour cream too.

Thursday, January 31, 2008

Homemade Yogurt using dry milk


My family eats a lot of yogurt. My kids don't like to drink milk (unless it's chocolate or in cereal), so yogurt is almost a daily food for us. The price of yogurt at the store keeps going up, so I have been looking into making my own. I found a system that works for me with which I can use my food storage dry milk.

This is all that you need:

4 cups water
1/4 cup of plain yogurt (or starter)
1 1/2 cups of dry milk

Put it all in a blender and mix it well.

Pour the mixture in your crockpot.

Leave in the Crockpot on warm for 10 hours. My crockpot has a low, high and warm setting. Low is too hot, but warm is just right. After 10 hours in the crockpot, put yogurt in the fridge to cool overnight. That's it. Very easy!

We have been stirring in some jam to sweeten and flavor it, but I plan to experiment with other flavorings like honey and fruit.
We have really enjoyed it in our home-made smoothies.

I love that I don't have to heat anything to a certain temperature or boil the milk before the fermenting process. I think because the milk is dry you don't have to boil it to get rid of the bacteria that may exist in regular milk. That is my theory at least. All I know is that this is what I do and it works well. My kids love the yogurt and I love that I am not paying so much for yogurt and I have total control over what additives are in there.

Here is a much harder way to make it.